
Trash to Treasure · Beginner DIY
How to Make a Chic DIY Bedside Tray from Repurposed Cardboard
Turn a leftover shipping box into a boutique-style nightstand tray — fabric-wrapped, sturdy, and ready in under an hour.
The Quick Answer
Tired of staring at a cluttered nightstand? This DIY cardboard bedside tray turns leftover shipping boxes into a chic, boutique-style organizer for your books, candles, or skincare bottles — no woodworking or sewing required. Using a simple “trash to treasure” layering technique, you can build a sturdy, fabric-wrapped tray in under an hour for next to nothing. It’s one of the easiest sustainable decor projects for anyone who wants a custom, upcycled furniture piece without the price tag of a store-bought tray.
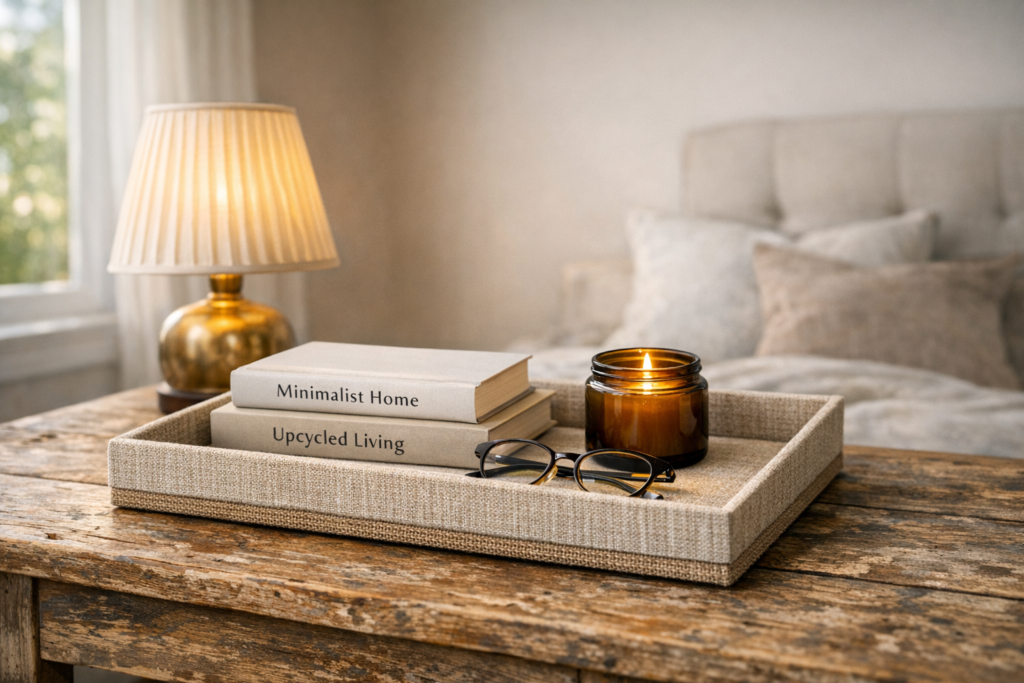
Project Details & Material Breakdown
Total Cost
₹0 to ₹150
Active Time
45 mins
Skill Level
Beginner
What you'll need
- Heavy-duty corrugated cardboard (leftover shipping boxes work perfectly)
- Leftover fabric scraps (linen or tight-weave cotton blends are best)
- Fabric scissors or a sharp craft knife
- Strong craft adhesive or fabric spray glue
- Ruler and pencil for measuring
Step-by-Step Instructions: The "Trash to Treasure" Method
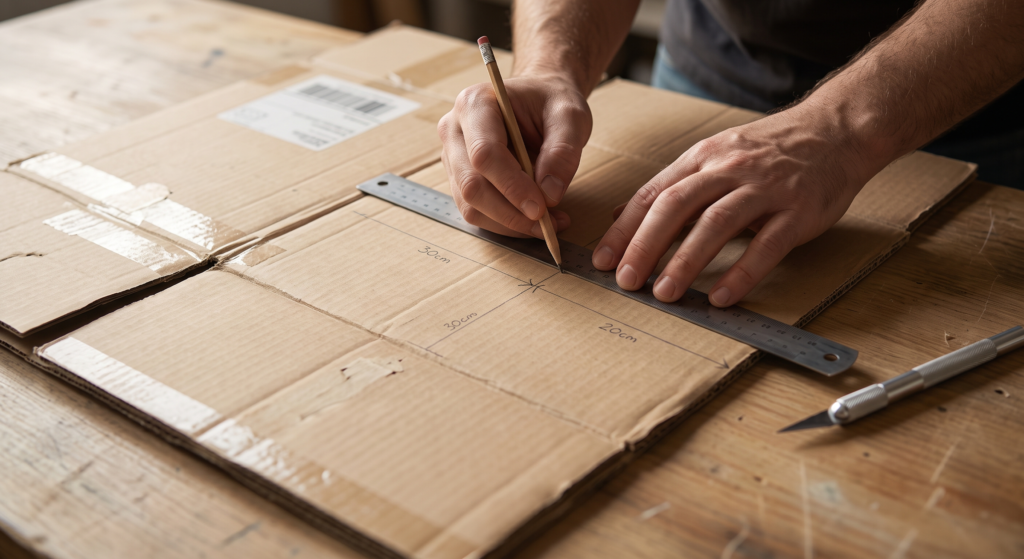
1. Measure & Cut the Base
Decide your tray size, then cut two to three identical rectangular pieces of corrugated cardboard. Layering them is the secret to a base rigid enough to hold candles, books, or a glass of water without bending.
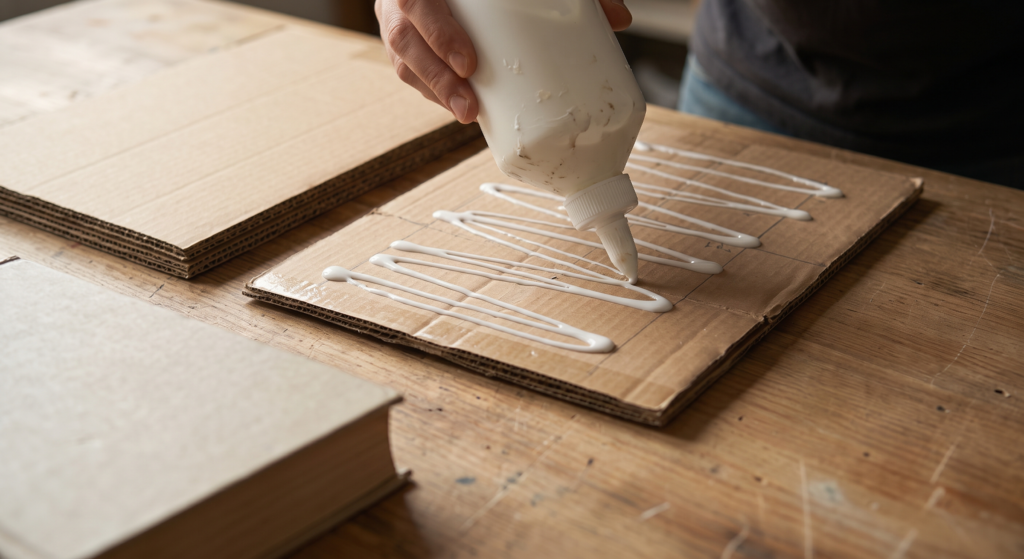
2. Glue the Layers Together
Apply an even layer of craft adhesive between each cardboard piece. Press firmly and weigh down with a heavy book for 10 minutes so the layers dry completely flat and secure.
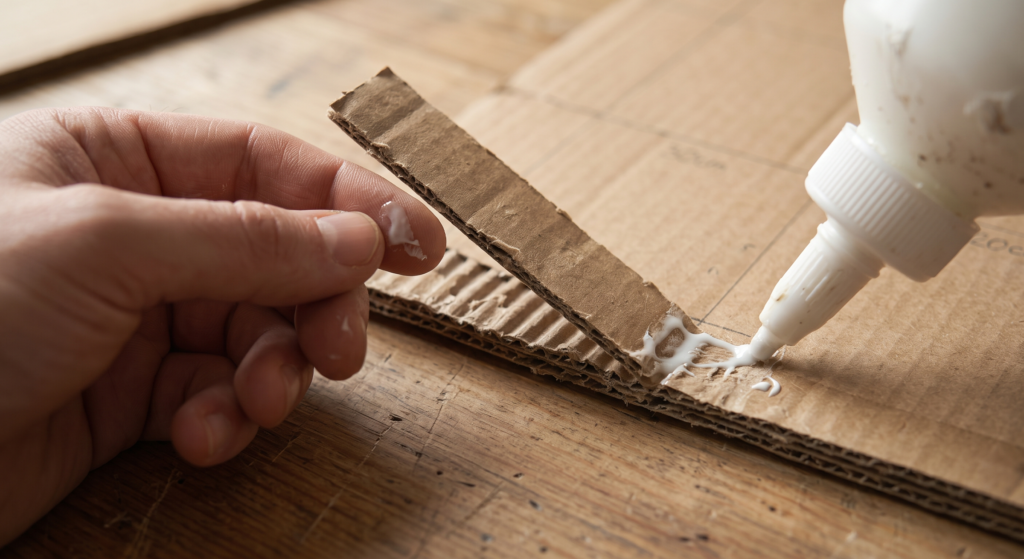
3. Build the Side Walls
Cut four cardboard strips for the edges (two for length, two for width), about 1.5–2 inches tall. Glue them securely to the outer edges of the reinforced base to form the tray walls.
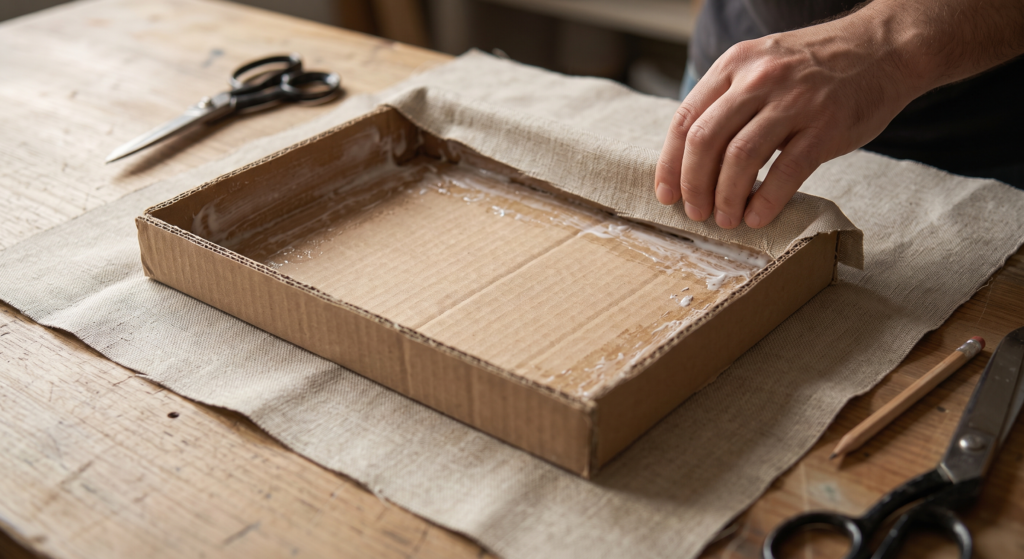
4. Wrap It in Fabric
Lay fabric face-down, center your tray on top, and spray adhesive onto the outside bottom. Fold the fabric up over the side walls and glue it to the inside — like wrapping a present. Pull taut for a smooth, wrinkle-free finish.
Troubleshooting & Customization Ideas
Strong fabric glue or a hot glue gun (thin lines only) works as a substitute — just hold each section a few extra seconds.
Want a phone slot?
Add a small 2-inch cardboard divider across one section before attaching the side walls, then wrap it in fabric along with the rest.
Fabric won't lie flat?
You’ve likely applied too much adhesive at once. Work in small sections, smoothing as you go.
Want a handle?
You’ve likely applied too much adhesive at once. Work in small sections, smoothing as you go.
Frequently Asked Questions
DIY Cardboard Nightstand: Will It Hold My Lamp and Phone?
Yes, when structurally reinforced. Layering two to three pieces of corrugated cardboard before wrapping in fabric creates a rigid, durable base that holds daily nightstand items without warping over time.
How Durable Is a Cardboard Bedside Table?
A properly layered, fabric-wrapped cardboard table is surprisingly sturdy and can easily support your daily essentials like a bedside lamp, phone, and a stack of books. However, because the core is paper-based, it does have limits. In a bustling, multi-generational household—especially one with a curious toddler—it can get dinged up if placed in a high-traffic zone. To maximize its lifespan, keep it dry, always use a solid coaster for water glasses, and keep it safely tucked next to your bed.
What's the best fabric to use?
Medium-weight, non-stretch fabrics like linen, canvas, or tight-weave cotton. They resist warping when glue is applied and give a smooth, professional finish. Avoid thin silks or stretchy knits.
Can this DIY tray get wet?
Not on its own — the cardboard core isn’t waterproof. For a water glass, add a custom-cut piece of clear acrylic to the bottom, or treat the fabric with a waterproofing spray.
Looking for more inspiration? Check out my other budget-friendly bedroom ideas.
Made your own version?
Snap a photo and tag us — we’d love to see your spin on this tray. Up next: try our no-sew throw pillow tutorial.