
-DIY & CRAFTS
Bespoke DIY Wall Art on a Budget
The designer’s guide to DIY wall art and custom crafts. Your blank walls are not a problem to solve — they are a canvas waiting for something genuinely yours.
- The Philosophy
The Rule of Intentional Art
When decorating on a budget, the biggest trap is filling walls with generic prints just to cover empty space. A wall crowded with unrelated art tells no story. It simply announces that someone was anxious about blank space — and anxiety, in a room, is always visible.
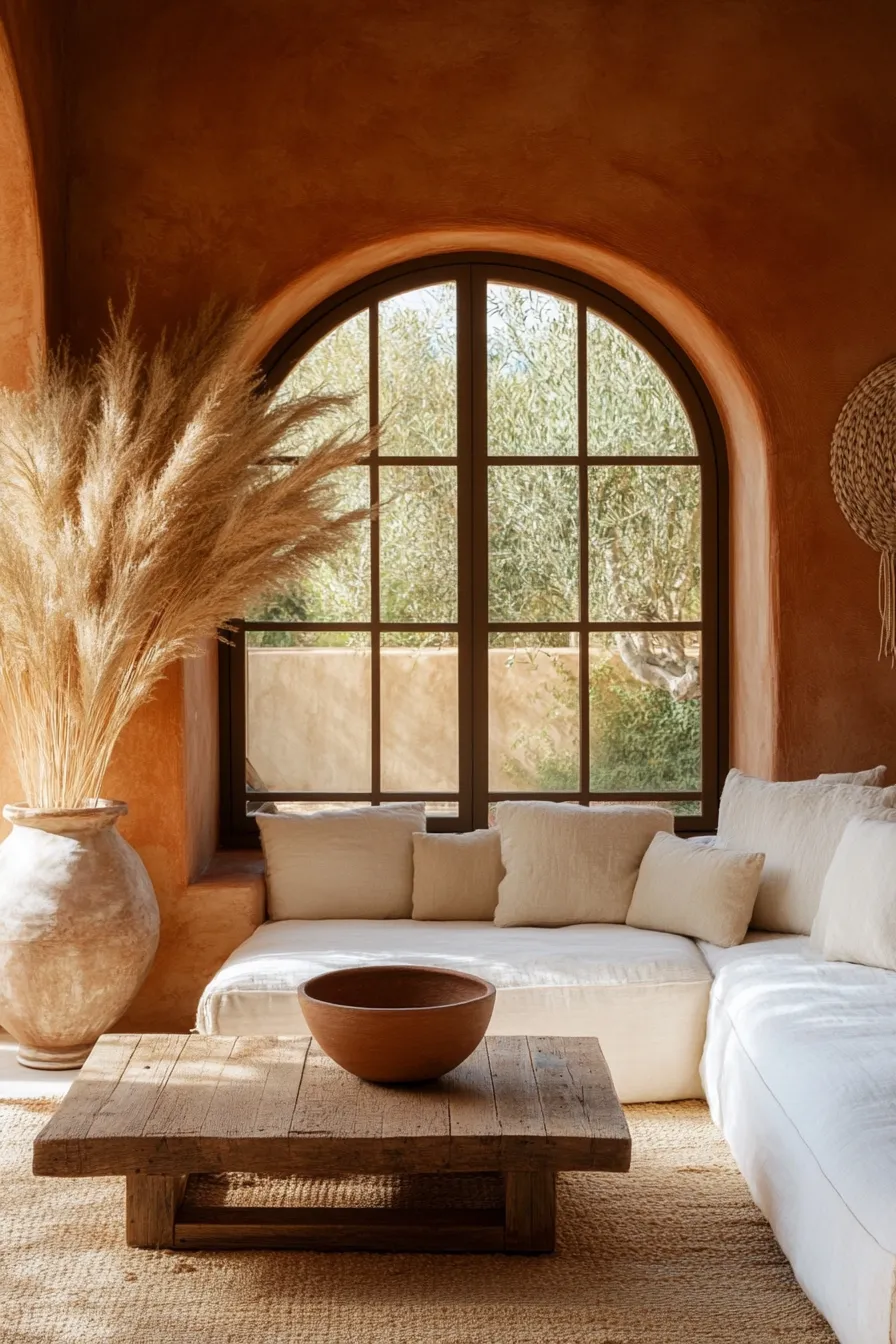
What a room actually needs is one thing that means something. A piece that has a material quality, a personal connection, or a scale that anchors the wall with genuine authority. The four projects in this guide are designed to produce exactly that — at a fraction of what a gallery or print shop would charge.
We focus on high-impact, low-effort DIYs for every aesthetic: the minimalist who wants texture without noise, the sentimentalist with heirloom fabrics to honour, the modernist who wants architectural scale, and the eclectic who wants organic life on their walls.
- Find Your DIY Wall Art Project.
Which aesthetic is yours?
Select your style and the projects below will highlight the ones made for you.
The Minimalist
TEXTURE, NOT CLUTTER
The Modernist
SCALE & STRUCTURE
The Sentimentalist
HERITAGE & MEMORY
The Eclectic
ORGANIC & LIGHT
Project No.1
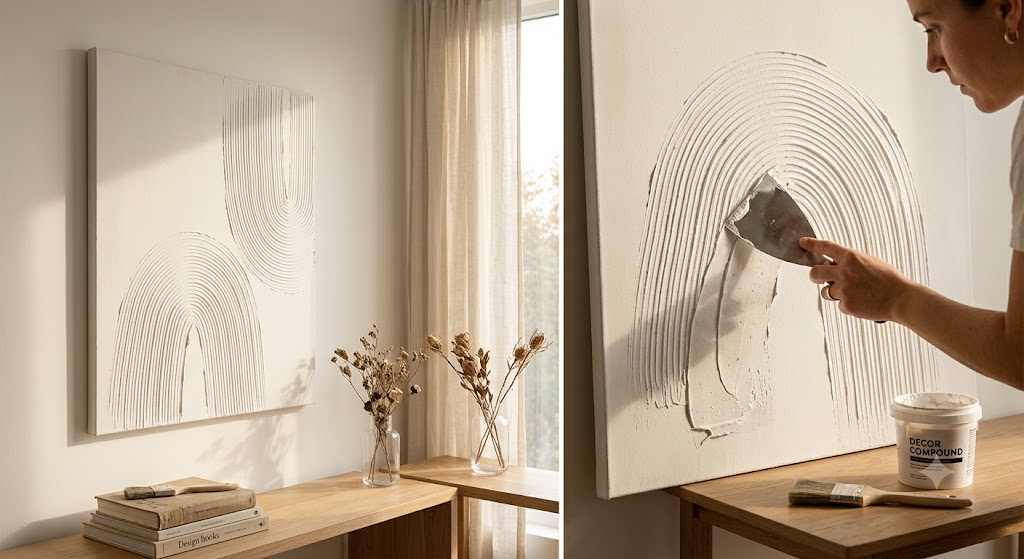
Plaster Canvas Art
Texture brings warmth to a clean space without visual noise. Spread wall plaster over a reused canvas using a putty knife to create geometric ridges, then paint it the exact wall colour for a monochromatic sculptural result.
View steps
Source an old canvas or buy the cheapest available — surface quality is irrelevant.
Apply joint compound using a wide putty knife in sweeping arch motions — work fast before it sets.
Allow to dry completely (12–24 hours). Sand lightly for a smoother finish if preferred.
Paint with the exact colour of your wall. The monochromatic result creates depth through shadow alone.
Choose the largest canvas you can find — scale is what makes this look expensive.
-Project No.2
Heritage Framing
MUSEUM QUALITY DISPLAY
Repurposing vintage fabrics instantly adds a layer of curated history to a modern room. A deep shadow box frame protects delicate silks while elevating the piece from a simple craft to a high-end installation that any gallery would be proud to show.
View steps ↓
Select a heritage textile — a saree border, handwoven dupatta, or embroidered panel.
Choose a deep shadow box frame (3–5 cm depth) to allow the fabric to breathe.
Mount on thick white or cream matting — the contrast makes colours sing.
Use museum-grade acrylic glazing to protect delicate silk from UV damage.
Hang at eye level (57 inches on center) against a plain, neutral wall.
Project No. 3
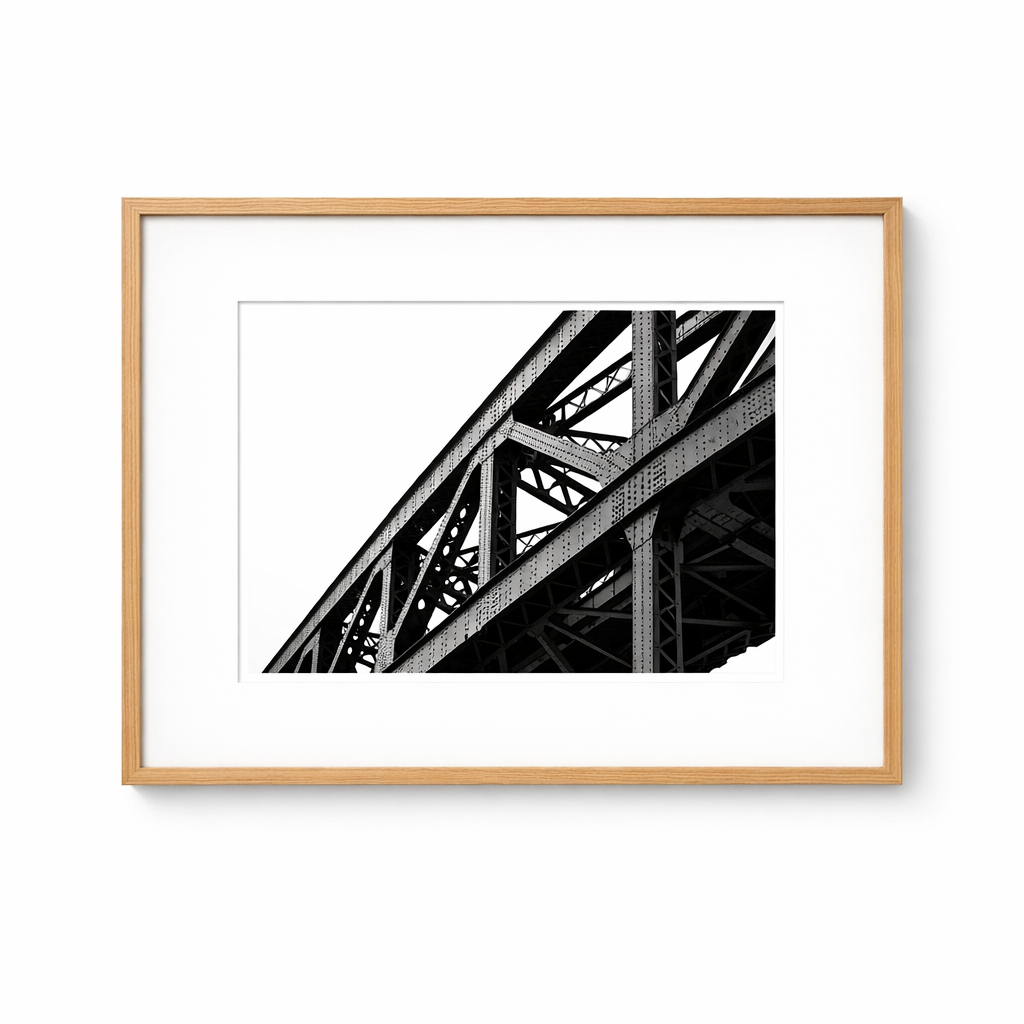
Oversized Blueprints
Print a black-and-white photo as an engineering print at a local shop. It costs pennies compared to fine art printing. Mount it in a sleek, thin black frame to anchor a room instantly.
View Steps
Choose a high-resolution photo — architectural, landscape, or abstract all work beautifully at scale.
Convert to black and white and increase contrast slightly in any free photo editor.
Print at your nearest shop as an engineering or CAD print (A1 or larger) — typically ₹100–300.
Mount in a slim black or wood frame. Keep matting minimal — let the image fill the space.
Project No. 4
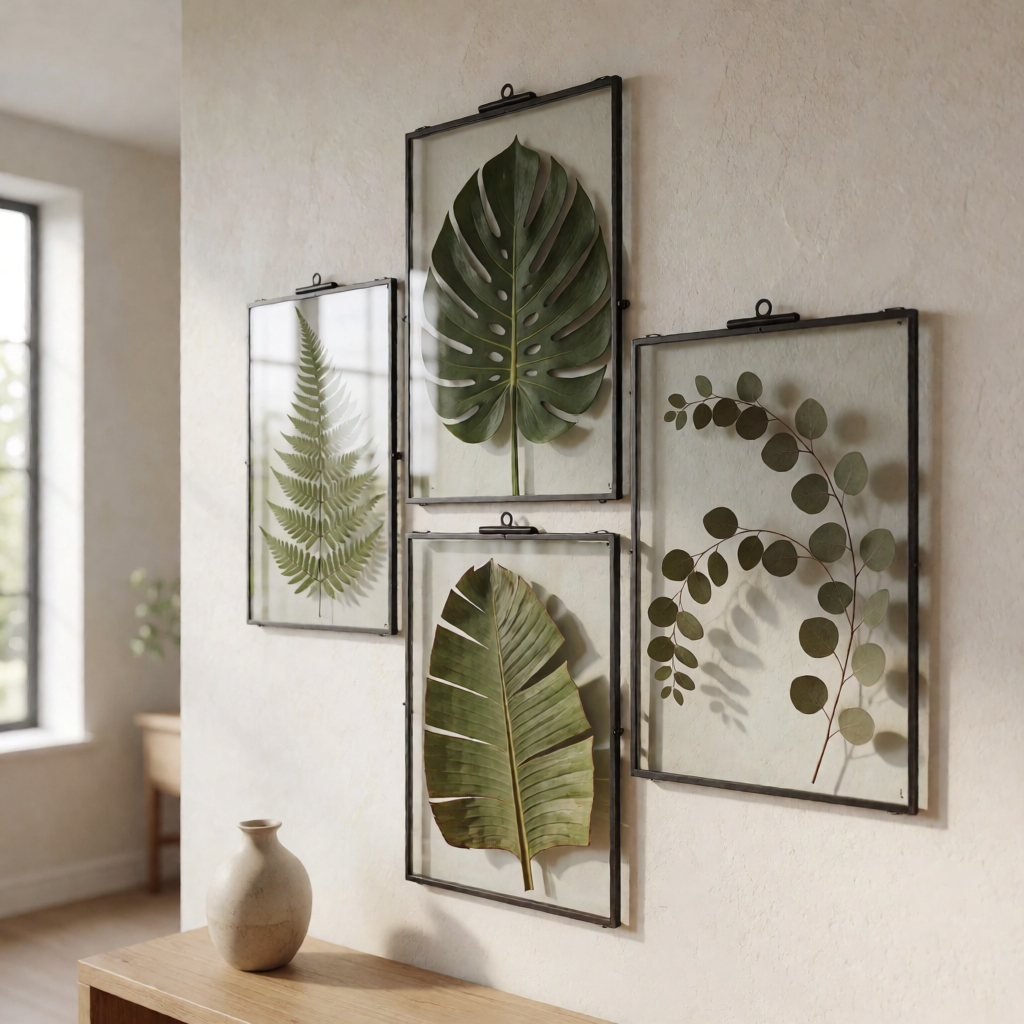
Floating Botanicals
For a light, airy alternative to heavy frames, press large, architectural leaves (like Monstera or Ferns) in floating glass frames. The wall color shows through, creating a seamless integration with your room’s palette.
View Steps
Collect large, interesting leaves — monstera, fern, banana, or eucalyptus all work beautifully.
Press between heavy books for 48–72 hours until completely flat and dry.
Place in clip-style floating glass frames — available at most home stores for ₹150–300 each.
Arrange in a loose organic cluster rather than a rigid grid — it always looks more intentional.
-Designer Rules
Anchor with scale
One massive 24×36 inch canvas always looks more expensive than a clutter of six tiny mismatched frames. When in doubt, go larger — a single statement piece commands a room, a collection of small ones fragments it.
The Eye Level Rule
The center of your artwork should hang roughly 57–60 inches from the floor. This anchors it to human height, not ceiling height. The most common mistake is hanging art too high — it floats, disconnected from the room.
Safety First
Use acrylic (Plexiglass) in high-traffic areas and secure bottom corners with mounting putty to prevent swinging.
-The Interactive Tool
Hanging Height Calculator
Enter your artwork's height and wire drop to find the exact nail position — so your center always lands at the perfect 145 cm (57-inch) eye level.
Place your nail at
145 cm
from the floor
-VISUAL RETURN ON INVESTMENT
Perceived value vs. actual spend
-PROJECT INVESTMENT &IMPACT
Know exactly what you're spending — and getting
All four projects, ranked by the perceived value they deliver versus actual material cost.
| Project | Materials Needed | Est. Cost | Designer Impact |
|---|---|---|---|
| Plaster Canvas | Old canvas, spackle/plaster, putty knife | ₹300–600 |
Museum Quality
|
| Textile Shadow Box | Shadow box frame, vintage saree/fabric piece | ₹800–1,500 |
Highly Personal
|
| Oversized Blueprint | B&W engineering print, poster frame | ₹600–1,200 |
Room Anchor
|
| Floating Botanicals | Floating glass frame, pressed leaves | ₹400–900 |
Airy & Light
|
Ready to curate your space?
Your blank walls are an opportunity, not a mandate to spend.
Download the complete beginner’s material checklist and start your first piece this weekend.